Tire jewellery
When I was collecting waste to use in jewelry-making, the idea for tire jewelry struck me. When I saw tires, I was inspired, and I began researching how to manufacture jewelry out of tires.
 |


The things gathered were the inside section of a tire, which is much more flexible and softer than the outer tire, as well as the internal tube of a tire.

The concept for the jewelry originated from a flower on campus, which I noticed while walking and was intrigued to.
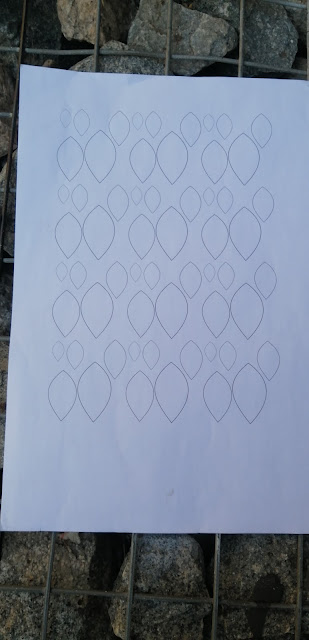
The forms above were drawn digitally to ensure accuracy and variety, while the inspiration for the designs came from a flower on campus.


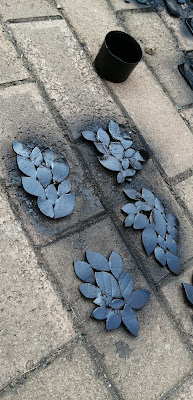
The tire was split into sections with scissors, and the flower shape design was pasted on the sections so the shapes could be cut out.


After the forms were cut out, they were washed and filled to provide more accurate and smooth ends because using scissors to cut them was difficult and did not provide smooth ends.
The next step was to experiment with the shapes to create jewelry items.


I began trying with tire and plastic bottle forms in various sizes, but the experiment did not go well, and I did appreciate the lightness of the plastic bottles.
Then I moved on to additional experiments, randomly putting the cut out forms.


While experimenting, I started making sure to use rubber adhesive to secure them once I had the desired shape.


When I was satisfied with all the shapes, they were all cemented together, and the process of working them off so they could look clean began.


the forms were smoothed out using a rubber wheel.
After cleaning, I wanted my tire shapes to shine, so I looked up a technique on YouTube while conducting my research, and it involved touching them to make them shine.

The method of torching failed since I had to reassemble my pieces after they broke apart during the torching
I then had the idea to use a black paint spray, and this technique was successful in making my pieces shine.


Once everything was ready, I began putting the tire shapes together to create a large and striking neckpiece.
Once everything was in place, I began assembling the tire forms to create a large and striking neckpiece, but before I did so, my lecture gave me the idea of what may happen if I set the tire shapes' top shapes, so I experimented with that and I loved the idea.


To give the item more space and to make it larger so that it can fit without a clasp, leather components are added to certain sections of the piece.


Comments
Post a Comment